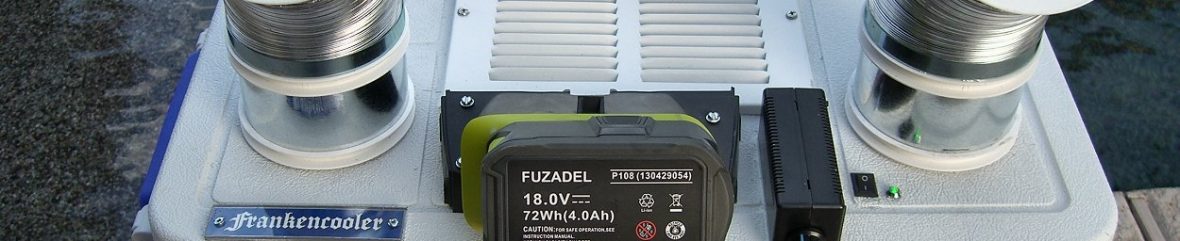

- One of the most common mistakes someone can make when building a Frankencooler is allowing air to get around the heat exchangers (radiators). When running, the blower(s) on a Frankencooler are working hard to pull air through multiple heat exchangers, and even a small gap can draw in hot air that can severely compromise the cooling effectiveness. A good quality, dense, foam tape is your best friend for sealing heat exchangers to surfaces. HVAC foil tape and silicone sealer are also handy in some applications.
- Even if you’re using a 12V power plug for juice, pay attention to manufacturers’ stated amperage draw specifications when choosing pumps and blowers for your project – lower is better. This is doubly critical when running off of a power cell/small battery as even .5 amp can make a big difference in running time.
- Keep the air chamber as small as possible. The area under the cooler lid and above the thermal barrier should be just big enough for the heat exchangers and tubing. Use 90-degree fittings on your heat exchangers to route water tubes more tightly, keeping the area as shallow as possible and allowing for a thicker insulative panel and more ice storage below.
- For maximum cool, do not operate blower(s) at full speed. Inline blowers of the type used by Frankencooler are powerful. Run at full speed, they can pull air through heat exchangers so fast that the transfer of heat (cold) is compromised. You’ll find that a range of around 50 – 75% blower speed provides a ‘sweet spot’ of strong airflow combined with maximum cooling.
- Consider the surface. The asphalt parking lot surface we tailgate on, even in the shade, is extremely hot. Being a cheapskate, my Frankencoolers are built from inexpensive coolers that don’t benefit from 3″ of solid foam insulation on their bottoms like a Yeti and the radiating heat takes a toll on the ice. Consider laying down a piece of foam board insulation like you used in your build underneath the cooler. If you don’t have foam board on hand, even a folded towel will help conserve ice.

A Big Tube In An Ice Chest Connected To A Blower
Every week I hear from people who who have already built an ice chest air conditioner yet are interested in building a Frankencooler(tm). The story is always the same: “In the video it looked like a good idea and it was cheap to build. It just didn’t work like I expected.”
A battery-operated fan blowing on ice, a cooler containing a big snaking plastic tube hooked to a blower screwed to its side, to giant coils of copper tube in front of box fans, you quickly find out the ‘good idea’ sucks as the ice quickly melts and the barely moving air turns warm. There’s a good reason why regular home and auto AC units blow air through a chilled heat exchanger instead of employing a giant plastic tube connected to a blower.
The Frankencooler design isn’t magic – it utilizes the tried-and-true technology of chilling airflow that has been around for decades but does so in a way that is unique to any other portable ice water fueled cooler. Totally segregating airflow from ice/water storage provides the longest ice retention, while multiple heat exchangers work together to typically produce an incredible 50-degree temperature differential in 100+ degree temperatures. Regardless of price, no purpose-built ice-fueled cooler on the market can match Frankencooler’s effectiveness.
The downside to this kind of performance is the fact it’s a little more complicated and expensive than draping a big tube through a cooler, but the results speak for themselves. Frankencoolers may be ugly, but they work – and when it’s 112 outside, that’s all that matters.

Frankencooler Tips
- Critical: Keep one or two gallons of water in your refrigerator to prime your Frankencooler as tap water will immediately melt a good amount of your ice, drastically cutting cooling duration.
- Use block ice whenever possible. A rough rule of thumb is one ten pound block per 1.5 hours of cooling (this obviously depends on outside temperature).
- Don’t run blowers at full speed, as there is a point where the air temperature will rise, as air is going through the heat exchangers too fast to effectively transfer cold. I’ve found that 60 – 75% blower speed is a good balance between airflow and temperature.
- If you are going to be using your cooler in a remote area where it is difficult for you to reach the motor controller to turn on/off/adjust blower speed (such as in a small aircraft). consider placing the motor controller on the end of a cable coming from the cooler. As long as you use adequate-sized wiring (I recommend 16 gauge for this), you can cable the controller 4′ – 5′ away from the cooler. Make sure you wrap your wiring in a protective sleeve.
- In addition, for remote operation of your cooler, Home Depot/Lowes also offers 48″ (and longer) 4″ flexible aluminum duct tubing you can use in place of the 24″ units I specify in my plans.
- After using your cooler outside, especially in dusty areas, wipe down the interior to keep it clean and prevent debris from accumulating in the heat exchangers.

The Right Components
Anyone who’s personally seen or built a Frankencooler knows how well this design works. Building one isn’t that difficult, but the ease of building and the ultimate effectiveness of the cooler can vary significantly depending on the components chosen. Cheap blowers that pull high amps will quickly deplete a battery. A motor controller that’s rated too low for the total load won’t last. The majority of marine pumps are bad choices for battery power. Most common-shaped heat exchangers are a pain to mount and difficult to seal. Choosing the right ice chest can by itself easily halve the time it takes to build a Frankencooler.
For over four years I have continuously tried new components in an effort to find the best mix of performance, ease of installation, and cost (you should see my inventory of stuff that didn’t cut it). Thanks to new wholesale accounts and large-scale purchasing, I am pleased to announce that I am now able to offer $$$ high quality, squared, easy-to-mount heat exchangers with threaded. solid brass 90-degree swivel fittings in all of my major component packages at no additional cost. In addition, I am now including intake heat exchangers like the one featured in my grey and orange ‘Ultimate Frankencooler’ in place of the large and cumbersome automotive heater core units : )
To kick off the summer, I have also re-instituted free UPS shipping for all component packages.
Thanks to everyone who has built their own Frankencooler and spread the word that these hideous looking contraptions outperform every other ice-fueled cooler on the planet, regardless of cost. Your word-of-mouth has made Frankencooler a success, and I sincerely appreciate it.
Summer Is Coming*
*With apologies to Game Of Thrones
In preparation for the upcoming summer, we have been fine-tuning our plans and components choices in order to provide you with the best self-contained portable air conditioners on the planet.
Bioenno Power Cells From Frankencooler™
We are proud to announce that Frankencooler is now offering 12V lithium iron phosphate (LiFeP04) power cells from Bioenna Power. Sized from 4.5 to 12Ah, these batteries come with dedicated chargers and are easily the finest power cells for the money available anywhere. In addition, we can also provide power packs, solar arrays, and controllers from Bioenno at the lowest prices you’ll find.
