
Here is a collection of some of the most common questions I receive.
How do your units compare to the small, DC-powered Chinese portable air conditioners? These new, small AC units are mostly 24V units, pulling 10 – 12 amps (too much for even 24V aircraft cabin power outlets). Like all AC units, these units exhaust hot air, requiring venting in an enclosed area. When used in an open-air environment, their anemic blowers are ineffectual and their power demands deplete batteries quickly. Most manufacturers’ ratings are for spaces of only 10 cubic feet (!) or less, promising a temperature reduction of 80 degrees to 64 degrees in 2 hours. This is hardly impressive for a small, enclosed area. Until revolutionary advances are made, small, self-contained Freon compressor AC units remain little more than an expensive novelty.
Is the Frankencooler(tm) a good choice for cooling a small apartment or room?
My cooler, like any ice-fueled AC, is too inefficient to use as a room cooler. If you have access to electricity, buy a portable air conditioner – the money you spend on electricity will still be less than what you’d spend on blocks or bags of ice. On the other hand, if you need effective area cooling for an extended period of time off the grid, absolutely nothing beats a Frankencooler.
What about using a Frankencooler or Blowbox for cooling a van or RV?
Again, compared to an AC, ice fueled coolers – even my designs – are too inefficient to cool large volumes of air, especially in a space where heat radiates through poorly insulated roof and glass areas. Think of these things as personal space coolers. If you can place the cooler within 5 – 6′ feet of you, you will be cooled, but the interior of your vehicle/boat/RV, etc. as a whole will likely not cool down that much on a really hot day.
What is the total cost to build a Frankencooler?
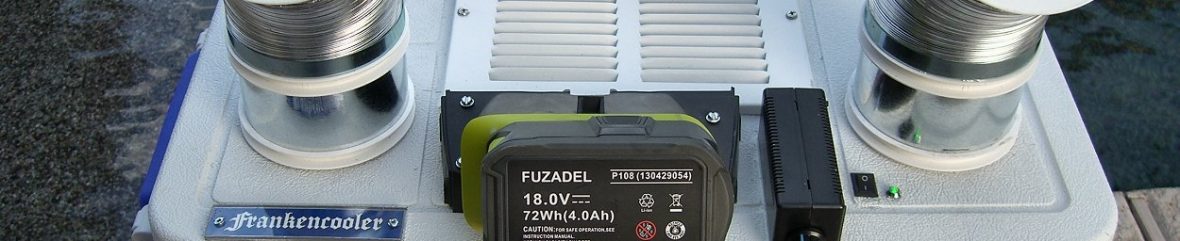
The blue and white model featured in some of my videos cost approximately $375 to build. That included $40 for a new Ryobi work fan which is where I obtained the Ryobi battery receptacle, and a 4.5 Ah knockoff Ryobi 18V battery. I already owned a Ryobi charger which costs around $35. With a broad range of pumps, blowers, coolers, etc. available, this cooler could have been built for much less or much more.
On the flip side, the grey and orange cooler you see in my videos cost me nearly $750 to build and features state-of-the-art components and features. Unfortunately, while it looks cool and can run for over 7 hours thanks to its large Bioenno power cell, it averages only a couple of degrees cooler air output compared to the blue and white cooler. With the heat exchangers and fittings I now buy directly from the manufacturer, I could build this cooler today for closer to $550. I might add that I have turned down $1000 for this cooler on multiple occasions and nearly that much for the blue one.
The Blowbox TWIN Component Package, while pricey, actually compares favorably with a traditional Frankencooler dual blower cooler-based build, as the package is very complete – requiring only wire, connectors, and a tube of silicone to complete. You do still have to provide a soft or hard-sided cooler for water/ice, but that can be as cheap or expensive as you desire. Its strong suit is ease and speed of construction – Blowbox units are much easier to build than cooler-based units. If using a hard-sided cooler, the only modifications needed to it are two holes drilled in the upper back for the two umbilical hoses and electrical cord connection to pass through.
Less expensive are the two single-blower Blowbox(tm) models I’ve come up with. These component packages are very complete, requiring only some miscellaneous supplies like wire, screws, silicone, etc. to finish. However, like the Blowbox TWIN, they do require a separate soft or hard-sided cooler for the ice/water. Unless you need to preserve ice for many hours before turning on your cooler, there’s no good reason to use high-dollar ice chests for this application. A Coleman X-Treme 62 QT cooler has wheels and drain and can usually be purchased for under $50. A 30 QT Igloo like I used on my latest TWIN build is only $35.
What is the best power source – 12V battery, 18V Ryobi battery, or 12V power plug?
My personal favorite for ease of use and quick charging are the 18 V Ryobi batteries even though they are low-tech and not available in larger sizes. Cooling duration over 2 hours requires a more powerful, quality battery, and the Bioenno Power models we offer are absolutely the way to go. For my “ultimate Frankencooler,” I use a 12 Ah Bioenno power cell that will run all day. If you are mainly using your Frankencooler in a boat, car, or plane, the power plug is the obvious choice.
Do I have to buy your component packages to build your cooler?
No – many people choose their own components online after reading the Frankencooler plans. My major component packages are for individuals who want what I have found to be the best setup for the money, without the hassle of sourcing parts all over the place.
Your component packages seem pricey – why?
You can definitely buy cheaper components. I’ve spent thousands over the last 7 years searching for the best components but unfortunately, quality comes at a price. This is what I’ve found:
Blowers: I can buy cheap Chinese blowers with comparable airflow for 1/3rd to 1/4th of the price I pay for the ones I use, but they are noisier, unable to deal with over-voltage when used with 18V – 24V power supplies, and pull much higher amps, resulting in reduced runtimes when using battery power. The blower I use is the best available, but I can not get true wholesale pricing on them because I modify them for this application.
Heat Exchangers: My Frankencooler(tm) branded heat exchangers are made for us by one of the world’s leading manufacturers. The unique squared design of these radiators are perfect for countersinking and mounting in my applications and feature separate plated solid brass threaded fittings and laser-etched Frankencooler(tm) logo. The cheaper, common radiators I originally used were difficult to fit and seal due to their standard shape, and their integrated straight fittings resulted in inefficient and cramped hose routing.
Motor Controllers: The controllers I use have proven to be very reliable and their case-enclosed design lends themselves to easy mounting in a variety of models. Blowbox units utilize a different style controller featuring an aluminum case, and 20 amp rating (my biggest TWIN unit pulls only 7.5 amps). I purchase these controllers in large quantities directly from their manufacturers.
Switches: There are tons to choose from, and I could buy ten for the cost of what I pay for one, but they would require my customers cut perfect rectangular holes instead of just drilling a round one. Also, my switches are illuminated, and use a separate lock nut to secure them instead of press-fit.
12V Power Plugs: I only use fused, heavy-duty and extra-long 12′ 16 gauge cords with quality plugs. You can spend 1/3rd the price for a shorter, lighter-gauged, non-fused cord, but why scrimp on something so important?
Will you build me a cooler, and if so, for how much?
I get this question often. While I really enjoy building these things, I’m an older guy with a bad back who can’t stand for the hours necessary to mass-produce them. Time permitting, I will occasionally build a Blowbox unit for sale (I do not build the cooler-based Frankencooler designs). When available, they are listed in the ‘Built Coolers’ section in the top menu. The additional charge for me to build your Blowbox is $200 – a waste of money if you are handy, money well spent if you are not 🙂
Why should I go to the trouble to build your cooler when I can just buy something like an Icy Breeze?
Unlike other ice chest air conditioners on the market, the patent-pending Frankencooler design doesn’t pull hot air into the ice chamber but isolates and insulates it from the ice and water, significantly slowing ice melt. In addition, Instead of a single, weak PC-style fan, the full-size Frankencooler features dual, powerful blowers that move 460 cubic feet per minute (CFM), while the single-blower Frankencooler AIR design moves 230 CFM. Instead of one heat exchanger, the full-size Frankencooler utilizes three, and even the small AIR model utilizes two. Other features that set Frankencooler apart are the use of high-quality marine pumps and blowers and digital, stepless speed controllers offering infinite blower speed control. While it may not be pretty, the Frankencooler is a serious cooling machine, not an overpriced, pretty novelty.
How long will a Frankencooler run on a battery charge?
That depends on the battery. A 4.5 Ah Ryobi battery will run a dual-blower Frankencooler for about an hour. The 6 Ah Ryobi for about 1.5 hours. Our Bioenno Power batteries will run a full-size Frankencooler for up to 6 + hours, depending on the model and pump used. The addition of a solar array and controller will provide around-the-clock operation in most conditions, making the Frankencooler an excellent off-the-grid cooling choice for events such as the Burning Man Festival.
Can I use any ice chest to create a Frankencooler?
While you can convert just about any ice chest into a Frankencooler, the job is made considerably easier by choosing a cooler with an unobstructed, flat lid underside to simplify the mounting of multiple heat exchangers. Other considerations are whether the cooler has a drain and/or wheels – both highly recommended. Whichever cooler you choose, make sure it is large enough to fit all of the needed components and hold an amount of ice needed for the cooling duration you’re seeking.
What kind of ice should I use in my Frankencooler? What about dry ice?
Dry ice should only be used in coolers that are rated for it – not all coolers are. I have found that the dramatically higher cost of dry ice isn’t worth the few degrees of improvement it provides. I always use block ice when possible as it seems to last longest. Ideally, I will put two 10 lb blocks in my full-size coolers for tailgating which easily lasts for well over two hours in blazing hot 105+ temps. A 10 lb block of ice goes for $1.99 in my area. A better alternative to dry ice are freezer bags such as ‘Cooler Shock.’ When used with ice, the melt times are extended.
I see you offer single and dual blower component packages. How do I determine which Frankencooler I need?
Unless you have limited space such as in a small aircraft or tent, I recommend the full-size dual blower design, as it offers room for more ice and a larger battery, providing the longest-running and cooling times.
Isn’t your Frankencooler just an expensive swamp/evaporative cooler?
No. An evaporative cooler blows air through a water-soaked pad resulting in a flow of cooler, moist air. In humid climates or conditions, these are ineffective as more humidity is the last thing you want. Frankencooler is a true air conditioner that uses ice water instead of gaseous Freon to chill radiators that cool a powerful stream of air. While the frigid radiators will gather some condensation if extremely humid air is blown through them, compared to an evaporative cooler, the Frankencooler is effective in any climate. Watch my Frankencooler heat testing videos to see that temperature differentials (the difference between incoming and outgoing air) are often an astounding 50 degrees in over 100-degree temperatures (30 degrees is considered effective cooling).
Why do you charge $20 for a download of your plans? Is it really worth it?
I’ve spent thousands of dollars refining what I (and many others) consider to be the most effective ice chest air conditioner on the planet, and months creating a set of plans to build it. Encompassing 20 pages and 37 photos, illustrations, and diagrams, these plans will guide anyone through the steps to build a Frankencooler, while avoiding the pitfalls I’ve experienced. BTW, I use the proceeds from plan sales to pay the costs for this website.
If I buy Frankencooler plans and later purchase the component package that includes plans, do you refund the $20 I paid for the plans?
Yes.
What kind of tools do I need to build a Frankencooler?
Basic hand tools and a drill are really all that is needed to build a Frankencooler. An electric jigsaw is handy for cutting holes in the cooler lid, but I prefer to use a razor knife as most inexpensive coolers are constructed of fairly soft plastic. Because there are electrical connections, a wire stripping/crimping tool is also recommended. Frankencooler plans available on this site outline in detail everything needed to build your own Frankencooler.
If I purchase plans or a component package, what amount of personal assistance can I expect to receive from you?
As much as you require. During the summer months, I spend hours a day responding to emails – including on weekends. It is important to me that you are able to successfully build your cooler and are happy with the results.
I also attend Cardinals football games. Can I stop by your tailgating tent to see your Frankencoolers in operation in order to evaluate them for myself?
Absolutely. We tailgate in the Grey Preferred parking lot usually near marker 55 – Look for the Frankencooler flag (below) flying above our grey and blue tent. Bring alcohol 🙂
